ATG Lower Body Basics on a Budget
ATG Basics: important strength and flexibility qualities
ATG Basics features the most important strength and flexibility qualities I’ve been coaching for the last decade.
I currently coach them three different ways:
#1: As three separate workouts:
-Lower Body Day
-Upper Body Day
-Spine Day
#2: As a list of all basics, with the deal being that you pick at least one exercise per day.
Example: My wife is due any day now with our third child, and schedule/recovery will be less predictable. She’s already planning to train right from this list, with no pressure on how much she does each day, but with the helpful, gentle discipline of having to do something each day. I will join her and train from this same list, even if I do a bit more than she does. This will give me peace of mind and a daily win, rather than failing to keep up with a more demanding program.
#3: As just one exercise (or two exercises which fit together strategically) per day, Monday through Friday, in specific order for balanced development.
Main example: I use this approach for students, after sports, to patiently cultivate incredible mastery of the body over years, with elite recovery and interest.
LOWER BODY & SPINE BASICS LIST
Lower body and spine exercises are especially helpful where equipment access is often a barrier. I give a lot of thought not only to refining the equipment I make for these exercises, but also to suggest less expensive exercise tools as options.
Here’s a list of each basic, with equipment insights:
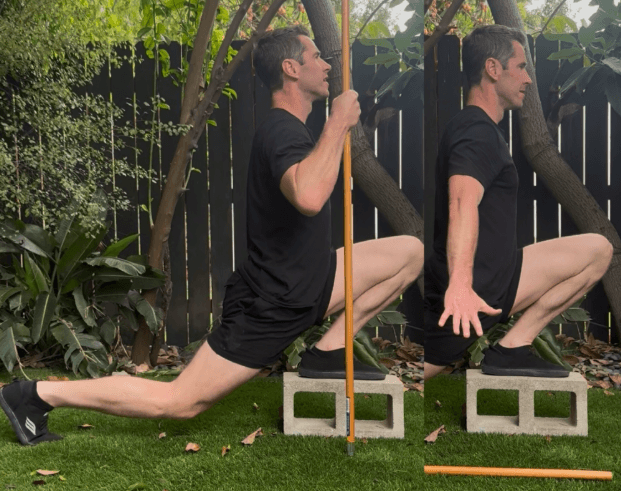
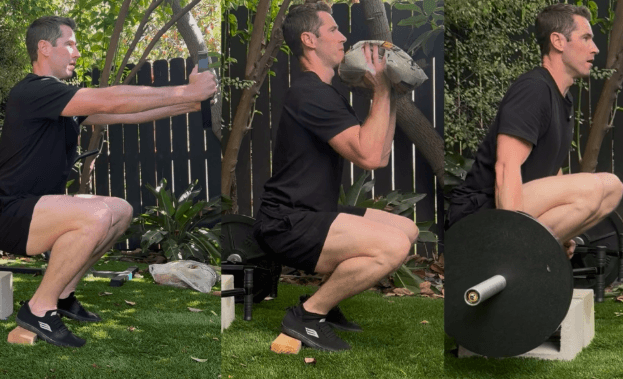
Full Split Squat: $2 cinder block, optional broomstick for assistance (free if you already have this, $10 or less if you don’t)
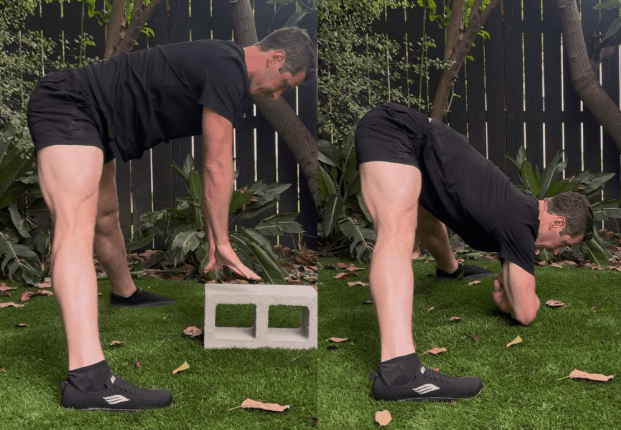
Standing Pancake: Free (with same $2 cinder block to assist and reduce range, if needed)
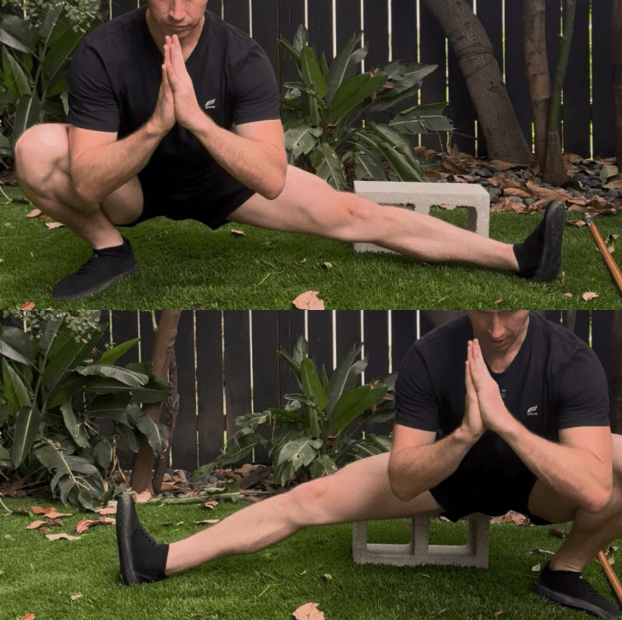
Cossack Squat: Perhaps free. This is not a mandatory exercise in my programs but may be a nice bonus for someone whose Full Split Squat and Standing Pancake are easy. (Cossack Squat combines those two mobilities.)
Hamstring Curl: Free (using a piece of cardboard) - progression is from two legs, to two-up-one-down, to one leg. Even a built-for-life ham roller isn’t expensive as far as exercise equipment goes
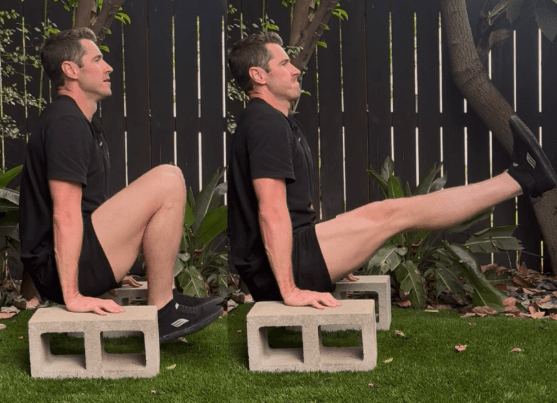
L-Sit: $2 extra for a second cinder block (This allows smooth progression from bent to straight leg.)
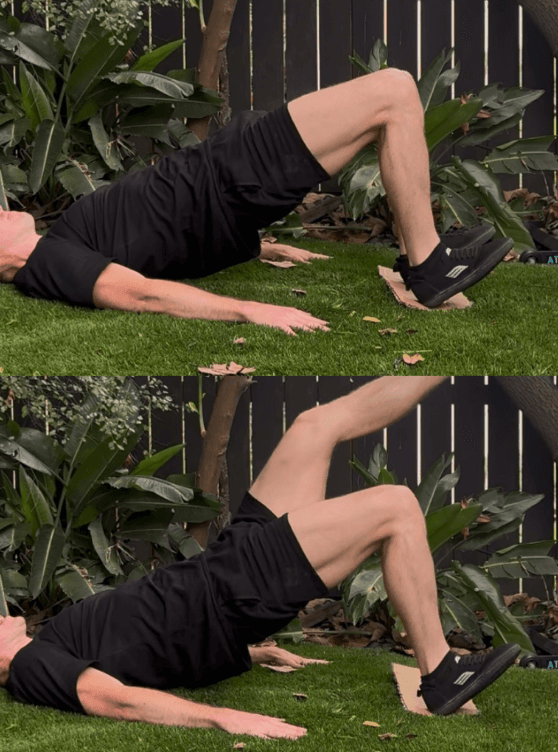
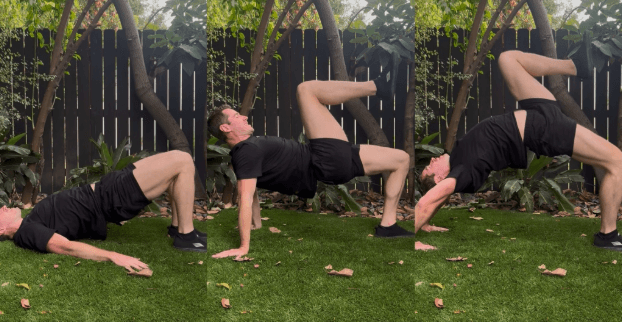
Bridge: Free (Think with three main levels: just hips off ground, then hips and torso off ground, then full bridge - and each level is tougher when you alternate holding one leg off the ground.)
Calf & Tibialis Raises: Free (unless you live in a hut) with your cinder block and just a wall for the tibialis.
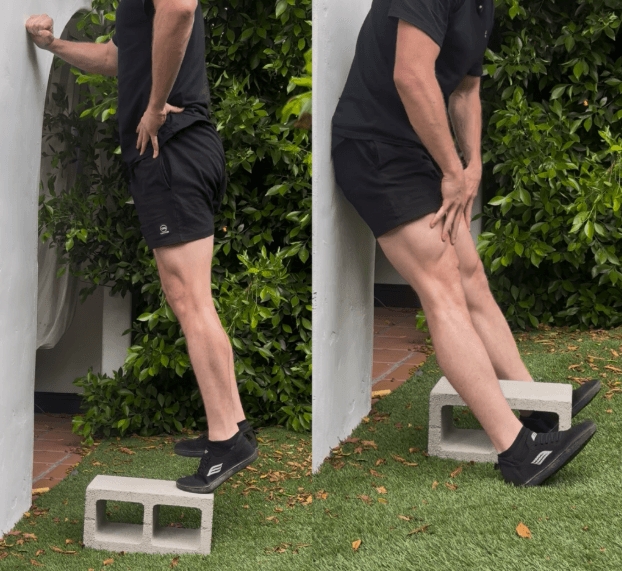
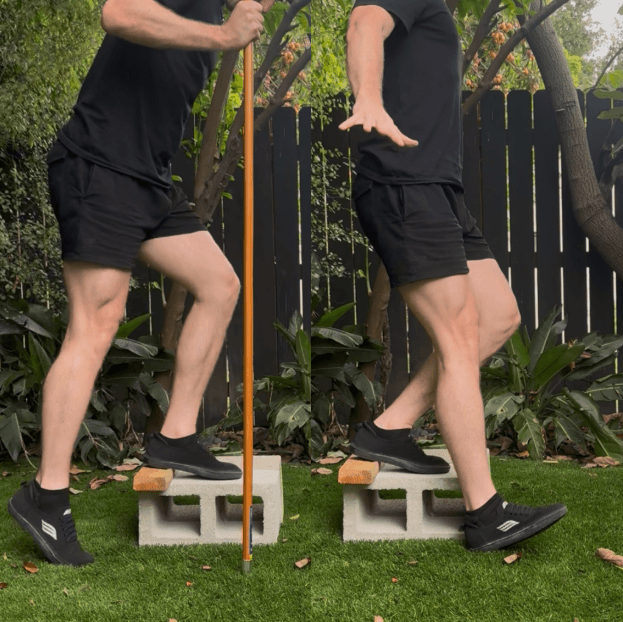
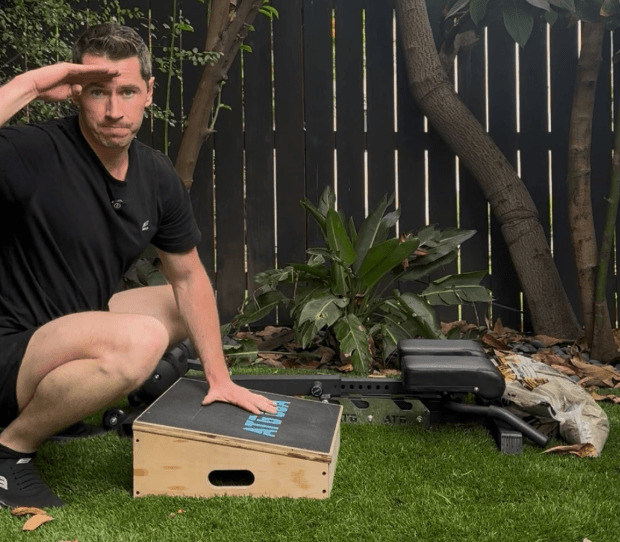
Stepdown Progression: $2 extra for a 2x4 to elevate the heel (Progression is: 1) from off leg from farther behind you to farther in front of you, 2) from back foot pushing off, to only touching your heel to the ground, and 3) from balance-assisted to unassisted.)
Full Squat Progression: $4 for a 50-pound sandbag is the lowest price I’ve found - but ANYTHING can work if you can reach it out for counterbalance, progressing the load closer to your body if you don’t have pain. That $4 sandbag would work well for basic health and longevity goals. For more elite leg strength, the safest and most minimalistic system I’ve found yet is using a hex bar on podium, which you can make for free with your cinder blocks + 2x4. This allows infinite loading without the same risks of failure when using a barbell because you can just set the bar down, and if your legs aren’t strong enough, you’re not stuck with a bar on your neck or crashing down. To be clear: I’m a big fan of front and back barbell squats! I’m simply adding the full hex squat to the picture, as it has specific advantages.
Back Extension: This is the first main piece of equipment I wouldn’t want to live without because of how much easier it has made life for me, my parents, and my in-person trainees. I’ve trained about 1,000 people in person, and each one was able to use this to comfortably start training the backside without pain. That being said, the $4 sandbag is my new personal go-to for loading, so that may be a money-saving option for some stronger folks! For my parents, I advise maintaining bodyweight with great control. Bonus: This same machine also allows gentle progression of strength and flexibility for the QL (Quadratus Lumborum) muscles. These muscles attach to each side of your lower spine and are a direct helper for the lower back, yet they’re almost never fully trained.

Closing Context:
This week I was asked to help a baseball player on a $100M+ contract. I’ve done this multiple times before and I have a simple regimen for a common issue in baseball (lower spine muscles built up way more on one side than the other, and chronic pain issues as a result).
That regimen is:
Single-Leg Back Extension (starting and finishing on the weaker side)
Full Split Squat
QLs (starting and finishing on the weaker)
This addresses the hip flexors, QLs and lower back muscles, all of which connect to the lower spine.
Those three form the basis of the ATG Basics “Spine Day.”
So what happened with the baseball star? I was able to toss my ATG podium and foldable back extension in the back of my truck, go help this athlete get immediate relief, and set him up with that simple, easy-to-follow long-term plan.
I would NOT have felt comfortable lugging around cinder blocks and a 2x4, and I would NOT have wanted to miss the full value of a back extension machine.
Hopefully you can see why I use some equipment, but also that I’m trying to stay in the game of figuring out how to save you money - without compromising results.
Last words:
I believe the secret to greatness in any area of life is actually identifying your BASICS and taking them to higher levels.
I hope this article helps you do that in some way.
Yours in Solutions,
Ben
Sign up for free knowledge
We send out new articles weekly.